A farmer who is delighted when people enjoy healthy plant based diets. I find peace in blogging about food and nutrition. Very passionate about improving the world system and ending hunger and poverty
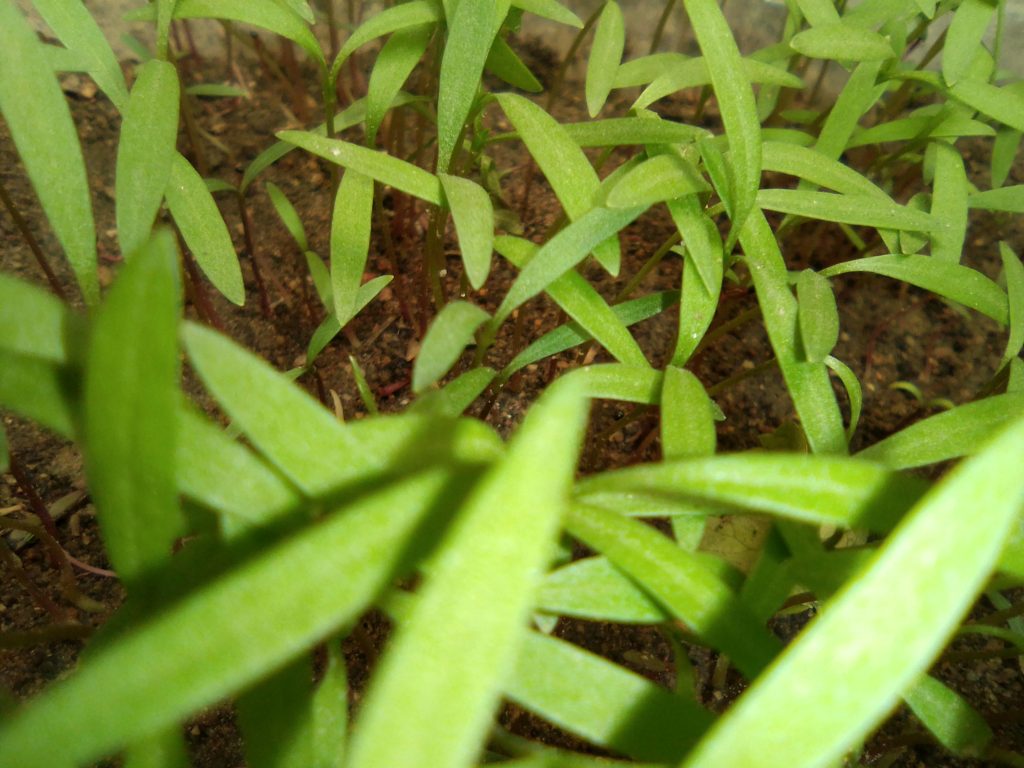
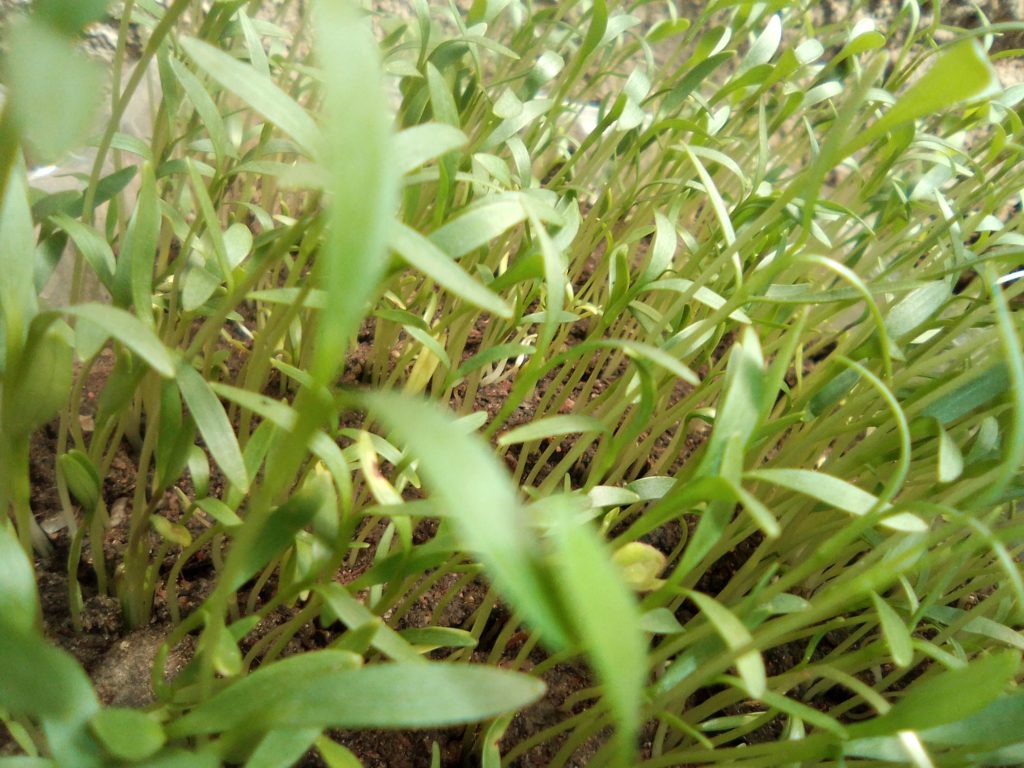
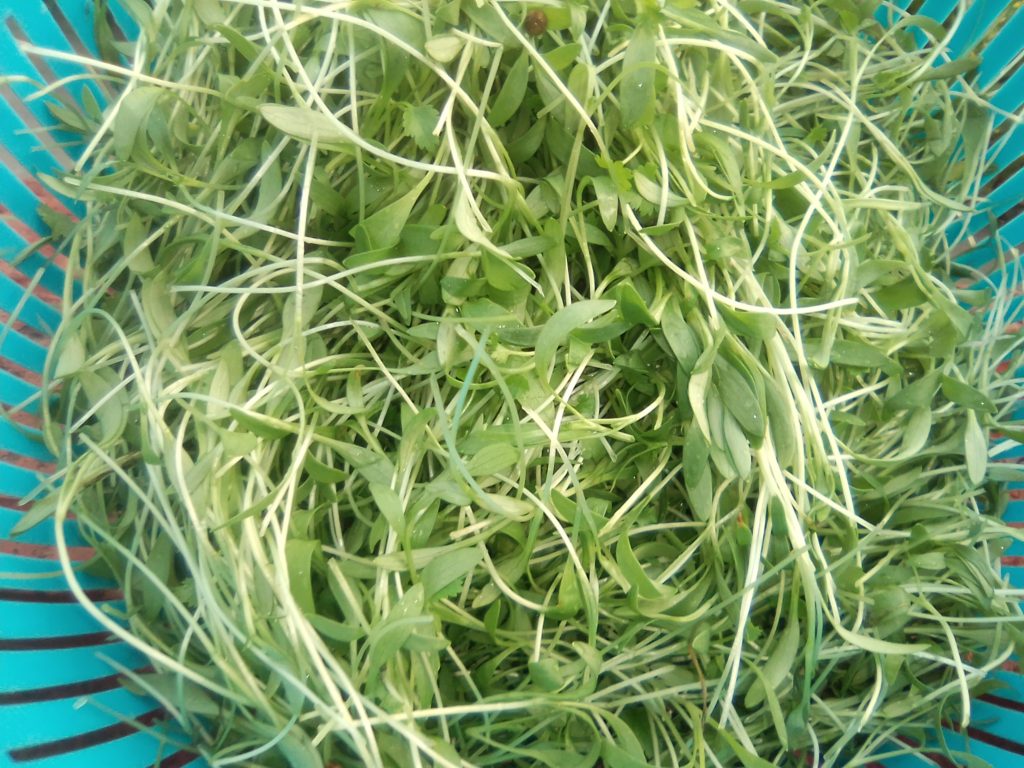
hey ! My friends, I hope you are well and you are in the holiday mood. This holiday, I want you to grow your microgreeens so that you enjoy fresh vegetables straight from your garden. So I want to teach you how to grow cilantro/coriander Microgreens.
So let’s go!
We are using the soil method, you need:
3 trays.
water
spray bottle.
Put some soil in a perforated tray, make sure you leave about 2cm above soil so that you will be able to water your seeds.
sprinkle some coriander seeds on top of the soil making sure that you create an even blanket but make sure that there are no seeds which are sitting ontop of other seeds.
Cover your seeds with a thin layer of fertile soil
Mist spray up until the soil is moist.
take one of the unperforated tray and let it sit ontop of the tray with the seed
take the trays and allow them to sit in the bottom tray, this is done so that water does not spill over
take your trays and put in a dark room to allow germination to take place .
NB: keep checking your moisture content up until most of the seeds have germinated
I have recorded and posted videos for this process on YouTube so you can follow the steps on the video to make sure you sow your seeds correctly.
so I will write about what we will do after germination.
Hi my friends, I hope you had a wonderful week of learning the beginner’s guide. This week we want to look at the materials that you need to start growing Microgreens. I will give you the most important ones.
so , here we go!
grow room: this is where you can grow your Microgreens, you can choose any room that is at your disposal. Here is a list of places where you can grow your Microgreens.
greenhouse, make sure that it is well ventilated.
basement- this can be idle space that you can use for growing your Microgreens but you must invest in lighting and and air conditioning.
spare room, kitchen, lounge, dining room even window seals.
2. grow media: this where your microgreens will grow on, I mean any agent that will hold the roots of microgreens. You can use anything that is cheap for you, for an example, soil, pine bark, cocopeat, hemp mats, jute mats, coco mats, gauze wire etc. Please not that each grow media has its own advantages and disadvantages, we will share out the video for different grow medias with their pros and cons
3. seeds:
one of the most important thing needed in Microgreens growing is bulk seeds which are organic, these seeds will allow you to grow as many Microgreens as you can. You have to buy seeds that are cheap and that will produce more. Why do you need to choose organic seeds? It’s because inorganic seeds will result in consumers suffering from many diseases which can be difficult to treat.
4. microgreens kits or trays.
usually microgreens are grown indoors therefore you need to grow them in kits or trays, you can grow Microgreens directly in soil but there are so many challenges that may be faced that we are going to discuss in the video that we are going to send.
5. organic fertilisers. Your microgreens can only be heathy and nutritious if they are given enough feed which comes from the organic fertilisers that we must put in the soil.
6. syringe, measuring cup. We use these. two items to measure water and liquid fertilisers that we will use.
7. water. If you are using the soil method, you are able to use tape water, but for those who use hydroponics, borehole water and pH adjusted water will be the best.
8. PH meter. This instrument is used when we are growing our Microgreens using hydroponics, the PH level for Microgreens should around 6
NB, you can grow your Microgreens without using a pH meter, you can buy the litmus paper. If your PH is not ok, it must be adjusted.
9. Mist sprayer: usually we use a mist sprayer so that our seeds do not get splashed out of the grow profile. Choose a size that is suitable for you.
10. Air conditioner , fans, dehumidifier, Usually microgreens are prone to molds, so your room should be well ventilated especially if you are growing indoors. In the event that molds are manifesting in your trays please throw away, this causes food poisoning.
So guys these are the most important tools that we can use to grow our microgreens. My pictures of the different tools are refusing to upload so, I will definitely edit this blog so that we can also use pictures to explain, so look out for our social media platforms so that you can also get the videos for this lecture.
Thank so much my guys for making a date with us , we are looking forward to meeting you on YouTube and tiktok for the videos on this week topic, please have a blessed Sunday and stay health buy choosing to eat plant based food,
Hey my friends , we are so excited to take you through a new fun and exciting journey of growing your own food at home. The main reason why we are offering this course for free is, we want people to enjoy fresh, taste and nutritious food which are organic. I know everyone knows that people’s immune systems are compromised because of the type of food they eat. In this module we want you to understand that you are the master of your own health if you can control what you can eat on daily basis. So our mission is to enhance people’s incomes, healthy and wellbeing through sustainable production and provision of plant based food.
We believe that many people do not have big spaces to do farming especially those who live in urban confined areas like the high density areas but did you know that you are able to grow your own own fruits, vegetables and herbs using urban farming and vertical farming?
I know someone is asking me this question.
What is urban farming?
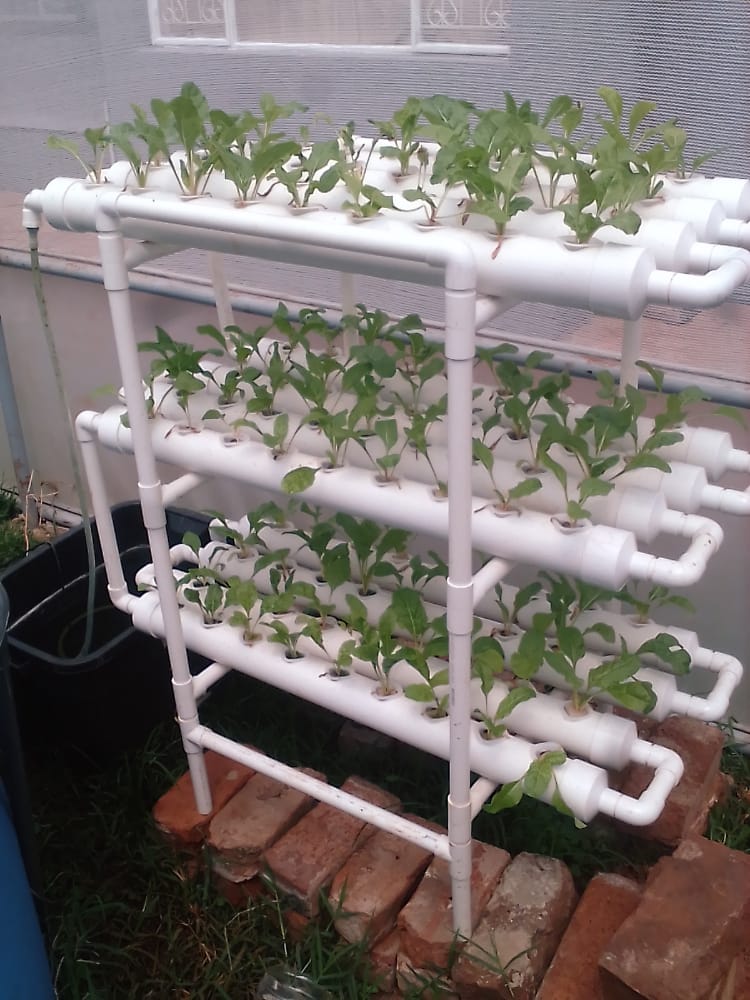
This is a contemporary farming practice that is done by households and entrepreneurs who stay in urban areas in this case they grow their vegetables using their backyards, indoors, greenhouses and basements. To get the best output using small spaces, urban farmers usually do vertical farming.
So what is vertical farming?
Vertical farming is a scenario where vegetables and other crops are grown vertically , in different layers going upwards. Vertical farming enables farmers to get more than five times the yield which was supposed to be realized when crops are grown horizontally. Smart soilless farming methods like hydroponics, aquaponics and aeroponics are employed. Even though we can also grow crops vertically, using the soil ,it’s expensive because we need a strong supporting structure since soil is heavy. Usually quick to mature fruits and vegetables are grown in urban areas, here are some vegetables which can be grown in an urban plant based farm.
sprouts
shoots.
microgreens
baby greens.
mature vegetables.
As an urban farmer you choose a cheap method and cheap type of farming method to pursue, therefore we are choosing Microgreens as our starter pack. I know you are all curious to learn what Microgreens are.
Let me blow your fuse a little bit! Can you imagine! I didn’t know what Microgreens are until year 2016 when one of my brothers became visually impaired. So I am quite sure that most of you have never heard of this but let me usher you into a new Fabulous way of farming. Come on take your notebook and pen and let’s get started.
What are Microgreens?
Microgreens are very small vegetables which are grown and consumed when they are still young. They are harvested when they are between 6- 21 days old from the day of sowing seeds. The sign that your Microgreens are now mature is they must be harvested when the have developed the cotyledon and one true leaf.
Reasons for growing Microgreens
A study carried out in America shows that all Microgreens have more than double nutrient content as compared to mature vegetables. So Microgreens should take a great potion in the plate for someone who is health conscious.
Microgreeens are also easy to grow because the production method is not labour intensive.
Microgreens can be literally grown anywhere in including dining rooms, kitchen and sinks . The truth is with Microgreeens you can start with the simple things and seeds around.
they are used for visual enhancement, so chefs love them for food presentation.
Used for flavour and texture enhancement therefore they are used for soups, salads, garnishing even on sandwiches.
they do not need much sunlight and grow very fast . For example if I am growing cabbage Microgreeens ,I need at most 12 days to harvest them but it takes me around three months to grow a mature cabbage, so you see, you are better off growing Microgreeens than mature vegetables
If you want to improve your health and wellbeing, then the best choice is Microgreeens.
Now let’s turn to who were the pioneers of microgreens growing?
Microgreens growing started in America in the late 80s and this type of farming became famous in South California and San Francisco in the mid 90s. As I am writing now the Microgreens growing industry is growing like veld fire in developed countries and it is estimated that it is quickly becoming a multi billion dollar industry in America. In Africa it’s still a new industry but countries like South Africa are taking this business seriously, so the reason I am writing this is to give you an inspiration to start something that can change your income, health and wellbeing.
As I am writing this article ,I have a feeling that you are all convinced that you can start your own simple farming even if you do not have space .
Yes , I am quite sure that you now want to start your own farm, but wait a moment! I want to tell you something that is very important.
The most important thing is to know some of the following characteristics and skills that makes people successful Microgreens growers.
you need to be good at organizing things. This is because all things that are required for Microgreens growing must available at the right time . You need to have a journal were you record everything that you do on daily basis so that you determine a stardard sowing and harvesting time
Passion and commitment.
will and determination.
patience, persistence and resilience.
innovative mindset
learning culture.
I hope you have enjoyed our first lesson and now your homework is :
examine yourself and determine whether you possess some of these skills and find a way that you can use to develop the skills. Please patience and resilience is key.
So thanks guys for reading ,I hope you enjoyed see you soon in our next lesson.
if you have questions please post them.
Do not forget to subscribe to our platform so that you get latest updates about our African food systems
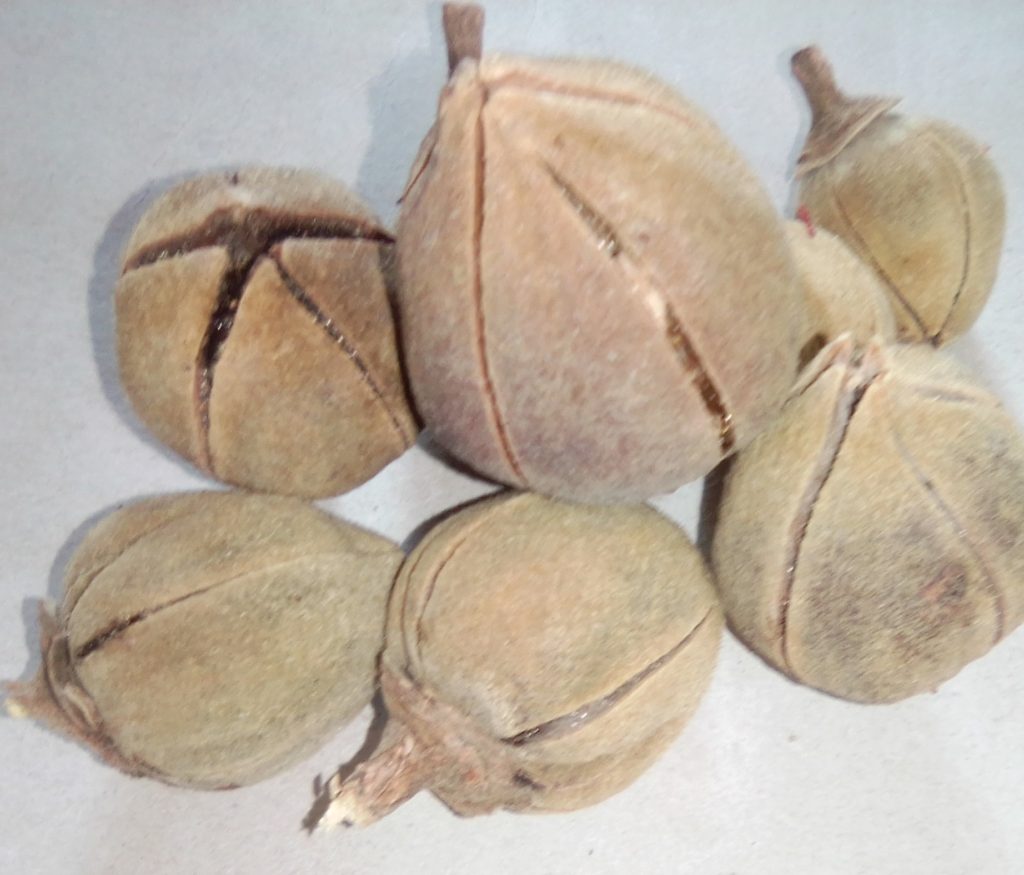
Last week we were in the village and we had an opportunity to get into the forests, we enjoyed wild fruits. One of the wild fruits that we had an opportunity to eat are snot apples .
I love the sweetness of the fruit and for me it’s actually an African bubble gum. They have natural sweetness and they are eaten the way bubble gum are chewed, like bubble gums, the residue cannot be swallowed.
Bono Salus 5
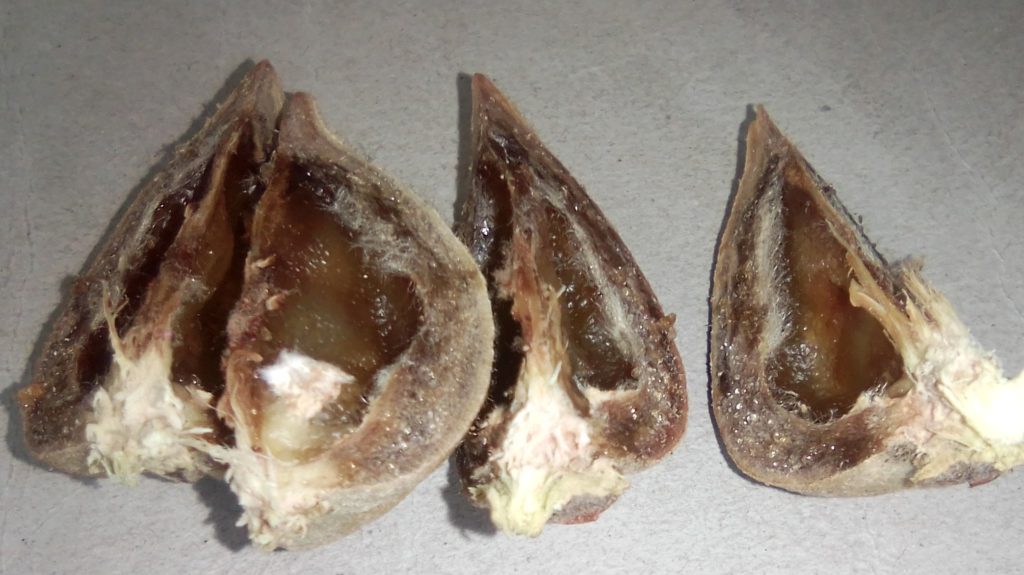
So the question is how do you eat this?
Open your snot apple and remove the seeds , so that you can take a piece at a time. So you can have something like this.
Bono Salus 6
You can now eat the pieces and sow the seeds so that your grand children will enjoy snot apples in the future.
Snot apples are so sweet, when eating them you might think that someone added some sugar.
but there is only one thing that I loothe, it’s the texture that you get after chewing.
Every household need delicious meals which are nutrient packed and flavourful. Best meals are prepared by cooks wh have enough supply of fruit, vegetables, meets, nuts, seeds etc, but sometimes it can be very difficult to have 75% of these things in your kitchen. So a wise person must look for a way that is sustainable to ensure that you have a continuous supply of your food. So today, I would like to show your how you can grow your own leeks from the few that you get from your friends.
For your own information, I started with only three leeks but now I can feed my family for the whole year .
So let’s go into the garden,
you need :
fresh tap water
a small container with a lid
One leek with roots
a knife
so the reason why we have the leek is we want to prepare good food. So we are going to use the upper part for cooking and we are going to propagate the base part.
Here we go:
Cut the leek, 2,5cm from the base, the keep the rest for cooking.
now take your container with lead, drill a hole that will allow the roots of your leek to get through but the leek should not fall inside .
fill in the container with 3/4 of fresh water
We are almost there, gently push your root inside the lid , allowing the roots to be the water.
The last thing is to take the container to a window seal
Leave it like that for some time so that some shoots appears, you can have more than ten shoots depending on how big and health your base of the leek was.
Wait for the leeks to grow tall, if they are about ten centimeters you can harvest and cook but today we want to grow more so
Detach every shoot from the main stem then transplant in good soil that have enough well aged compost. water when necessary, but make sure you have chosen a good sunny spot which recieves enough daylight. Within some few months , you will be able to harvest your leeks and as you are harvesting, keep on repeating the process,
Your family will always enjoy taste food if you do this.
here is a link to the video. https://vm.tiktok.com/ZMFjCp9S1/
There is nothing so exciting like eating fresh produce which are straight from your garden. just because I love micro greens so much, I am introducing microgreens from our traditional vegetable sources. guess what! We are now doing blackjack microgreens for you.
but why blackjack? I know someone has this question.
This is because blackjack is packed with health benefits and no one can afford to lose this benefits. We would love you to enjoy every part of your life by staying health and beautiful. You can only achieve this if you eat health natural food. That why we are introducing blackjack microgreens in our product line. We are quite sure you will love them. Naturally blackjack is a good source of vitamin C and fiber.
Blackjack is wildly available in all parts of Zimbabwe but when it comes to food, people rarely consume it, people consider it to be associated with poverty, but today I want to remove that poverty mentality in you by giving you some of the health benefits associated with black jack. When you see someone cooking blackjack, just know that the person is health conscious. Some people do not consume it because they do not know how to cook black jack.
Here are some important use of blackjack!
Tonsillitis: boil some water add some fresh leaves of blackjack. Wait for some few minutes so that the liquid becomes warm, when its now warm gurgle the water and spit it out. you can do this three times a day up until you are OK.
Boosting immune system : if your immune system is compromised due to problems like cancer and HIV, you can use it as tea, or cook it the way you do vegetables. this will allow you to add some nutrients in your body.
Here are some diseases that can be treated by black jack
diarrhea
ingestion
wounds
Now that you know the uses of blackjack, let’s get into the kitchen and cook and prepare a delicious meal!
Ways of using Blackjack microgreens
you can substitute it for covo when eating sadza
add a few on top of your rice or spaghetti
cooking blackjack microgreens
lets assume you have left overs after enjoying your salads. please do not throw away because I have two other ways you can use them and the ways are:
blend them in your nutritious smoothie
cook them with peanut butter do not forget to add leeks, onions, tomatoes, cilantro and rosemary, its so delicious , I BEG YOU! try it,
The most important thing that you must know is blackjack is super delicious when it is off-season, try using it this time when it is scarce.
One of my colleagues was very low this morning, so I asked him what was going on with him and he could not explain, He said, “I feel like I am just depressed, I do not know what is going on with me, I am just low.” So I just joked saying, ” I think you do not need a doctor but you need to be careful when selecting food.” So he said “go on, maybe it might help me .” So I started telling him about how a balanced diet improves his mental health. He thanked me and confessed that for the past weeks he had never been taking a balanced diet. So This gave me an insight of how people suffer because of lack of knowledge. This actually inspired me to write this blog.
Many people experince mood swings due to a many reasons, but today let me concentrate on food as one of the causes of mood swings. Many people can be depressed only for a few hours then the mood can change again. This affects the person and all the people around him so it is better for us to manage our own mood through choosing healthy diets. We realised that many people appreciate that they are experiencing mood swings but do not understand what is causing this.
The type of food that we eat can also impact on our mental health negatively so let’s us all make it a point that we eat a balanced diet so that when our mood changes we do not suspect the food we eat.
A balanced diet consists of all food sources that will give the consumer all the necessary elements that will make his organs to function well. Therefore it is wise to eat different types of food in recommended proportion so that we do not hurt or disturb some of our organs.
Make sure you include whole foods in your meals, avoid overprocessed food . By so doing you are giving yourself a good mental health. Whenever you are witnessing mood swings, the first thing is to check if you are still taking a balanced diet. Include a lot of unprocessed fruit and vegetables in your meals. Your plate should have a rainbow colour so that you take the right quantities of different minerals and nutrients that support your organs.
We all want to live peacefully, so we have to be in charge of our lives. If we want a good mental health, it can only be so if we are doing activities that helps us to stay in good shape like eating a lot of good food.
It’s so exciting that many people are now health conscious but I know we still have others who lack information about how food can affect the functionalities of our body organs.
Our body can be subjected to many things that can affect our mental health so whilst you are eating a health diet seek medical attention.
This month’s activity is to help our loved ones to eat wisely because we are what we eat.
every family needs to enjoy healthy and nutritious food. At times we complain because we think that we do not have enough money to buying expensive food that can make us health.
today I would like to introduce you to a healthy and nutritious source of food that you will never forget in your life.
Growing up in the village, blackjack was abundant especially in summer and it would grow wildly in my father’s maize field. I did not like it’s taste but now I understand why?
its becausr it was kind of bitter because we were not giving it any special attention because we thought that it’s a weed. So last year so few blackjack plants grew in our garden and I started watering them, I even put some manure, I tell you the day I put them in plate, they were so tender and we enjoyed our meals.
Even though we knew that blackjack is given to people with poor immune systems so that they could improve, we had never valued it .
so , after eating fresh blackjack from our garden, I realised that it needed special attention for it to taste good. But how could we introduce it in the market since edible weeds here are associated with poverty. This means that value addition is the way to go.Yes we knew few guys who supplied blackjack powder and blackjack oil but I did not know how to use these two products so I did not bothermyself to try.
I wanted my own unique way which which could involve all age groups so I started doing blackjack microgreens what?
yes I said blackjack microgreens, these are so tender and and can be incorporated in many dishes. They make my dishes look so fancy at the same time they give the consumer highest level of nutrition.
I know you are asking me this questionSo were should I use blackjack microgreens.
use them together with garlic leeks as a garnish to your meat, you can use them as topping to your burger or even stir frying with olive oil or any oil readily available in your kitchen,
you will love it, I know, try it.
so stir fried Microgreens can be a eaten with Sadza if you are Zimbabwean and you can also be adventurous , try new recipes from your head and you will enjoy the delights of good food from nature.
I hope you have enjoyed this and we are going to be sending you many recipe to try with different Microgreens
cilantro does well in the open space in winter hence we have it in abundance during this season. The problems comes in summer when it becomes scarce. This mainly happens in Zimbabwe where very few people owns greenhouses. Indoor farming is known by only a few
Today we would like to let you know that you can have your constant supply of coriander by utilising a limited space.
But how?
Ok, welcome to the world of microgreens farming.
what do you need?
An enclosed spaceif it outdoors , the place must receive natural light
If it is indoors you need grow lights
Coriander seeds which are organic
Fertile soil
Growing containers
Mist sprayer.
A greenhouse is ideal for Microgreens.
steps.
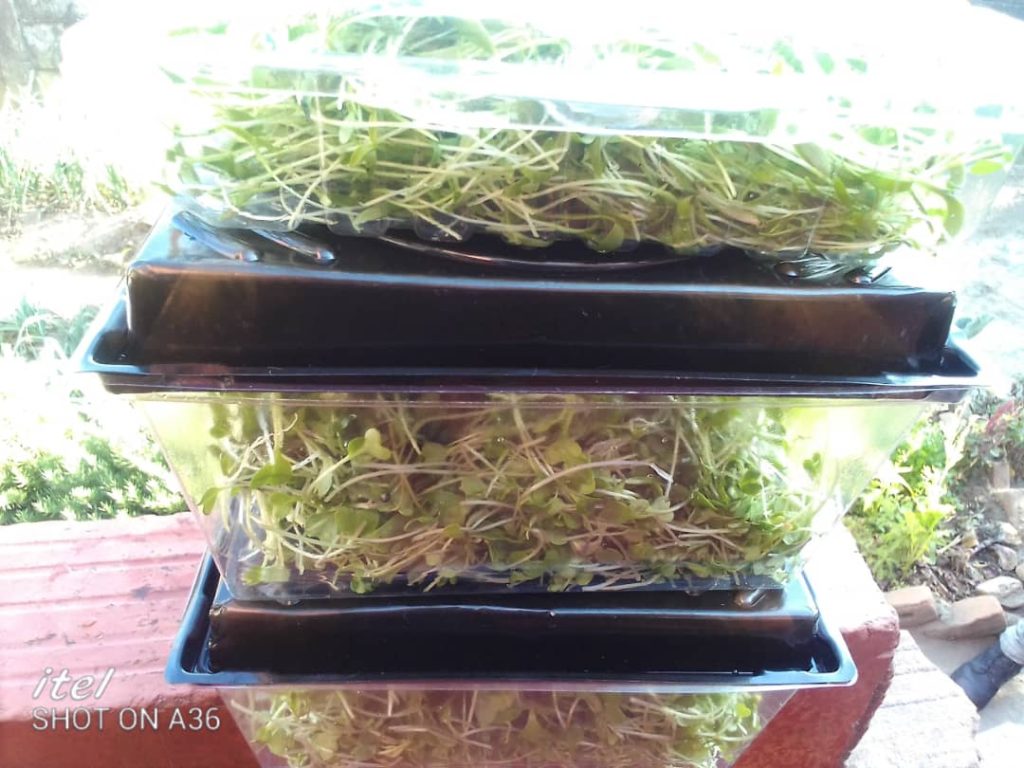
you need three containers of equal size, one which is perforated and two others which are not.
fill your perforated container with soil, make sure you soil is leveled.
sprinkle some coriander seeds evenly on the soil, making sure you create a thick blanket but no seed should sit on another seed.
spread a thin layer of soil on top of the seeds , make sure there are no bumps , you must have a flat surface. Just place another container on top. Allow your container to sit in the unperforated container to avoid spills of water everywhere. Make sure you have a flat surface, lift the top container then mist spray with adequate water. Close it with the last container then place this in a dark room but everyday check for moisture content and moulding.
allow this to germinate, after germination, place in a black out dome for three days. This allows our Microgreens to grow tall.
after they have reached a desired length , transfer them to a spot which receives light which does not scorch them.
take good care as you wait patiently for them to mature.
harvest day.
make sure your Microgreens are clean, use your sharp knives to cut or you can use a scissors.
Voilà, Microgreens are now ready to be eaten, wash them and send them to the dining table.
How boring and draining is it to order spawn from as far as Harare or South Africa. You think of the cost of transporting the grain spawn and the hustles of receiving such a heavy shipment. Today, I would like to make you forget about all these challenges by introducing to something new and fun especially if you are a hobbyist or you are just growing mushrooms in small quantities for your family consumption.
Did you know that you have the power to propagate your own mushroom from fresh mushroom stems? I know you are just saying, “come on”.
“Yes ,I have just said from from the roots “.
ok!
“We do not want to waste our time, let’s get started!”
things needed.
Fresh Oyster roots
Unwritten or unpainted cardboard boxes.
A pressure cooker
A clean transparent plastic zipper bag.
Procédure.
shred your cardboard boxes so that they fit well in your pressure cooker. The quantity you will shred depends on the mushroom roots available.
Pour some water that covers your shredded material in your pressure cooker.
Put your pressure cooker on, allow this to cook for more than 30minutes. We are doing this because we want to kill all the unwanted organism that may compete with our spawn. This called pasteurisation.
When well done transfer from the pressure cooker to a mesh wire to allow water to drip naturally, watch this, up until no water droplets comes out when you squizze the cardboard boxes, then your grow media is damp and moist not soggy.
Now take your zipper bag which is clean , start loading a layer of pasteurized cardboard boxes. Then put some mushroom roots. on top of the roots spread more cardboard boxes.
Repeat this process up until all your materials are finished.
Zip your bag
Poke, some small holes around your bag for proper air circulation.
You can now cover this with something dark or put in a cupboard to prevent direct sunshine from reaching our bag.
Leave this for about 6- 10 days.
Keep on checking if there is no contamination. A contaminated bag can be dark brown, black, grey but do not mistake this to the grow media you have used . If it is contaminated, please throw away.
A safe bag will become white with mycelium which will be spreading in the bag
When the whole bag has been fully colonised, transfer it to a place that receives indirect light and mist spray twice or thrice a day.
After 3days you will start to notice some pin heads forming, then you can try to poke bigger holes so that fruiting can take place well.
Continue misting and giving enough air to avoid drying out and small fruiting bodies. Within five days from the start of fruiting you will start enjoying your mushroom fruits.
Nothing can limit you, you can also be a mushroom farmer and you can feed your family with heathy nutritious meals everyday. Next time, I will teach you how to propagate large volumes of grain spawn from mushroom roots
So my parting words are:
Enjoy every meal by taking your food from your garden.